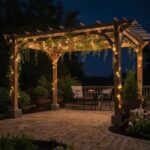
Thinking about turning your open verandah into a usable room all year round? Learning how to enclose a verandah in Australia is less about throwing up a few screens and more about getting the structure, regulations, and materials right for your local climate.
In most cases, you’ll eventually need a licensed professional to ensure everything is compliant — and if you’re in South Australia, Riteway Restorations is a trusted option.
Done well, an enclosed verandah can become a second living room, home office, play area, or simply a better, more comfortable outdoor space. Done badly, it can leak, overheat, attract mould, or land you in trouble with your council.
This guide walks you through the key decisions step by step – from clarifying your goals and understanding regulations, to choosing materials, managing costs, and deciding when you really should call in a professional.
Clarifying Your Goals And Assessing Your Existing Verandah
Defining How You Want To Use The Enclosed Space
Before you price anything or draw up plans, get crystal clear on how you want to use the space. Your answer will drive almost every design decision.
Ask yourself:
- Is this a casual outdoor room (for meals, reading, kids’ play) that still feels open to the garden?
- Or a more formal extension of your home – a sunroom, home office, or extra living room?
- Will you use it mainly in summer, winter, or all year round?
- Do you need security, or is it more about insects, shade, and weather protection?
For example:
- If you just want breezy, bug‑free evenings, a screened enclosure with ceiling fans may be enough.
- If you’re aiming for a four‑season room, you’ll likely want glazing, insulation, and possibly heating/cooling.
- If you plan to work from home there, you’ll need reliable power, data points, and good acoustic insulation.
Write down your must‑haves versus nice‑to‑haves. This keeps you focused when you’re comparing products and quotes.
Checking Structural Condition, Orientation, And Climate Factors
Next, look honestly at what you’re starting with. When you enclose a verandah in Australia you’re often asking an originally open, lightly built structure to perform more like part of the house.
Check:
- Posts and beams – Are there any signs of rot, rust, warping, or sagging? Timber in particular can hide issues around fixings.
- Decking or slab – Is it level, solid, and adequately supported? Any soft spots, bouncing, or cracking?
- Roof structure – If the verandah already has a roof, is it properly flashed to the house? Any leaks or corrosion?
Then factor in orientation and local climate:
- North‑facing verandahs (in Australia) can be wonderful all year with good shading.
- West‑facing areas can become heat traps in summer: you’ll need serious shading, glazing choices, and ventilation.
- Coastal locations demand corrosion‑resistant fixings and often favour aluminium over standard steel.
- Tropical, high‑rainfall, or cyclone regions require stricter structural design and careful detailing to prevent leaks and mould.
Taking photos and notes now will make conversations with designers, builders, or council officers far more productive later on.
Understanding Australian Regulations, Permits, And Bushfire Requirements
Council Approvals, Building Codes, And Zoning Rules
You generally can’t just enclose a verandah and hope no one notices. In most Australian councils, adding walls, substantial screening, or roofing changes can trigger approval requirements.
You should:
- Check with your local council early – rules vary by state and even suburb.
- Confirm whether your project is classed as a minor structure, a home extension, or an alteration to an existing building.
- Understand what’s needed: Development Approval (DA) and/or Building Approval/Construction Certificate, depending on your state or territory.
All work must comply with the National Construction Code (NCC) and relevant Australian Standards – even if your council says the project is exempt from a formal DA. This covers things like: If you’re in a strata complex or community title scheme, you’ll also need owners’ corporation/body corporate approval.
Bushfire Attack Level (BAL) And Other Safety Standards
If your home is in a bushfire‑prone area, enclosing a verandah can trigger Bushfire Attack Level (BAL) requirements. These aim to reduce ember attack and radiant heat risk.
Key points to check:
- Your site’s BAL rating (e.g. BAL–12.5, BAL–29, BAL–FZ) from your original building documentation or council.
- Requirements for external walls, glazing, doors, and screens – such as toughened glass, metal mesh, and specific frame types.
- Any changes to roofing, eaves, and subfloor enclosures that may need upgraded protection.
Other safety standards that often apply include:
- Safety glass in doors and low windows (AS 1288)
- Balustrade and barrier rules if your verandah is elevated
- Slip‑resistance requirements for new flooring
If your home is in a high BAL area or cyclone region, getting a building designer or engineer involved early is usually money well spent.
Privacy, Drainage, And Neighbour Considerations
Australian councils are sensitive to neighbour impacts, so think about:
- Overlooking and privacy – will your new enclosed space look directly into a neighbour’s yard or living areas?
- Overshadowing – will higher walls or a new roof reduce sunlight to your neighbour’s windows or their solar panels?
- Stormwater and runoff – any new roofing or concrete must manage water properly and not dump it on adjoining properties.
You may need:
- Privacy screens or obscure glazing along certain boundaries
- Adjusted setbacks from fences
- A stormwater plan showing gutters, downpipes, and connections
Having a friendly chat with neighbours and showing them your sketch or concept plans can head off objections later.
Choosing The Right Enclosure Type For Your Verandah
Screened Enclosures For Breezy, Insect‑Free Spaces
If you mainly want relief from mozzies, midges, and flies while keeping that open‑air feeling, a screened verandah is often ideal.
Advantages:
- Excellent airflow and natural cooling
- Lower cost than full glazing
- Generally less impact on your home’s existing energy efficiency
- Easy to add ceiling fans and outdoor‑rated lighting
You can choose from:
- Fixed screens in powder‑coated aluminium frames
- Sliding or bifold screen doors for flexible openings
- Retractable screens that disappear when not in use
Opt for high‑quality mesh (and possibly midge‑proof in coastal/ swampy areas). Cheaper mesh can sag and tear quickly, especially in harsh Australian UV.
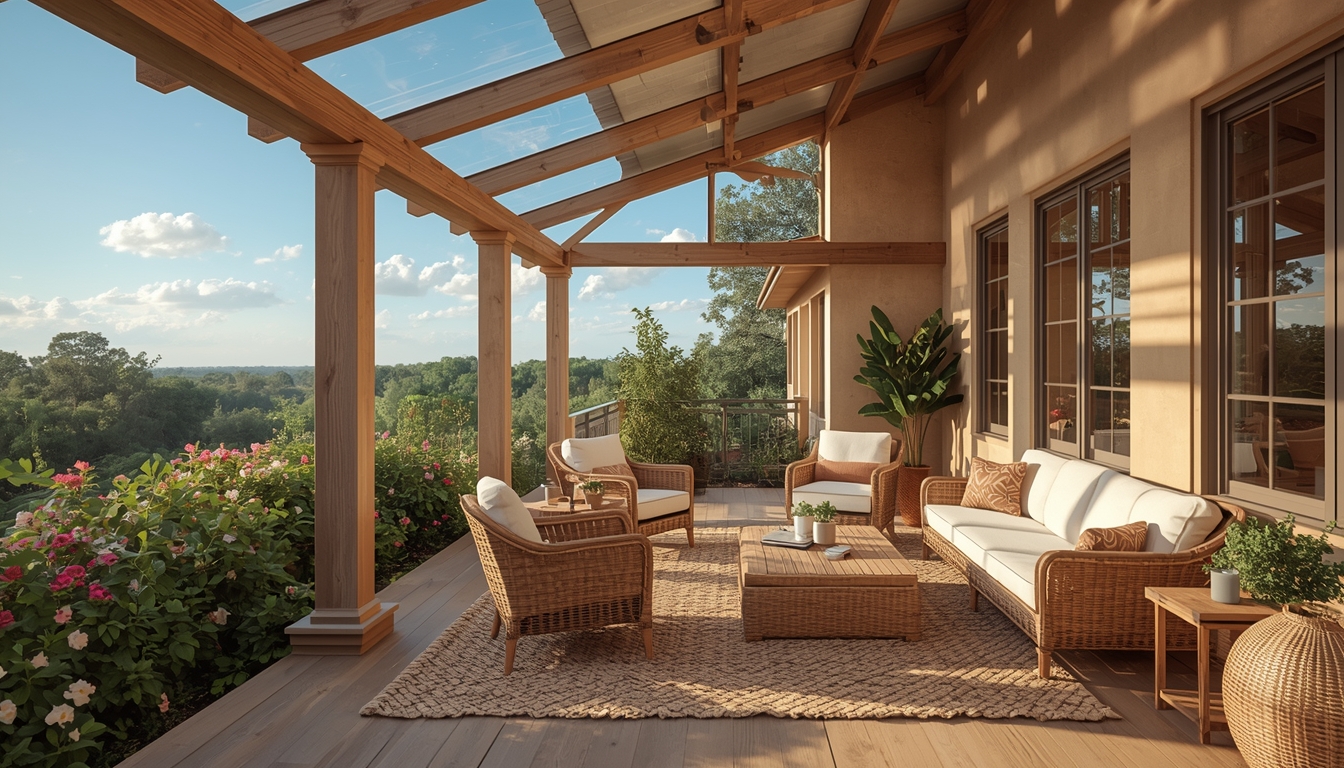
Glazed And Semi‑Glazed Options For All‑Weather Use
If your priority is to use the space in rain, cold snaps, and winter southerlies, you’ll likely want glazing.
Options include:
- Full‑height glass windows and doors for a true sunroom feel
- Combination solid and glazed walls to balance privacy and light
- Louvres and sliding panels that open generously in mild weather
For most Australian locations, consider:
- Double glazing for better temperature and noise control (especially in cooler climates or noisy suburbs)
- Low‑E glass to reduce heat gain on exposed, sunny orientations
- Tinted glass carefully – it cuts glare but can also darken the adjoining indoor room
Semi‑glazed designs – for instance, solid lower walls with screened or louvred uppers – can give you privacy, weather protection, and airflow all at once.
Modular Systems Versus Custom‑Built Enclosures
When you look into how to enclose a verandah in Australia, you’ll quickly find two broad approaches: modular systems and custom‑built solutions.
Modular systems (pre‑engineered panels, doors, and roofs):
- Faster installation and fewer design decisions
- Often cheaper upfront
- Come with engineering for standard wind zones and site conditions
- Limited flexibility in sizing, layout, and finishes
Custom‑built enclosures (by a builder, carpenter, or designer):
- Tailored to odd shapes, heritage homes, sloping decks, and tricky junctions
- More options for materials, claddings, and glazing
- Better ability to match your existing home aesthetically
If your verandah is a simple rectangle with good access, a modular system may be very cost‑effective. If it’s older, out of level, or architecturally distinctive, custom work usually achieves a much better result.
Best Materials For Australian Conditions
Framing Options: Timber, Aluminium, And Steel
Your framing choice affects not only how your enclosure looks, but also how it weathers over time.
Timber:
- Warm, traditional look – great for Queenslanders, cottages, and character homes
- Needs regular painting or staining
- Must be termite‑protected and suitable for external use
- Can move and swell slightly with moisture and temperature changes
Aluminium:
- Very low maintenance and corrosion‑resistant – ideal for coastal locations
- Wide range of powder‑coat colours to match existing windows
- Generally slim profiles, which can maximise glass area
- Can feel more contemporary/”modern” than some older homes, though colour choice helps it blend in
Steel (including galvanised or powder‑coated):
- Strong, good for larger spans and cyclone/wind regions
- Needs proper corrosion protection, especially near the coast
- Slightly bulkier profiles, but extremely durable when detailed well
In many Australian suburbs, you’ll see aluminium used for lighter screen and glass enclosures, with timber kept for decks and structural posts.
Glazing, Polycarbonate, And Screening Materials
When enclosing a verandah, you can mix materials to get the performance and budget balance you want.
Glazing:
- Toughened or laminated safety glass is usually mandatory near floors and doors
- Double glazing improves comfort but costs more and adds weight
- Frames must be sized correctly for the glass type and local wind loads
Polycarbonate and acrylic panels:
- Lightweight and impact‑resistant
- Good for roofing or high‑level infill areas
- Available in clear, tinted, or opal finishes
- Must be UV‑stabilised to avoid yellowing and brittleness in the Australian sun
Screening:
- Standard insect mesh works for most urban settings
- Midge‑mesh with finer apertures is worth it in coastal and wetland regions
- Pet‑resistant mesh is heavier duty and resists claws and knocks
Think about cleaning and long‑term clarity: some cheaper plastics look cloudy after a couple of summers.
Roofing, Insulation, And Flooring Upgrades
If your verandah roof is old, noisy, or badly insulated, enclosing the space is the perfect time to upgrade.
Roofing:
- Insulated panel roofing reduces heat and rain noise and often looks more finished internally
- Colorbond or similar steel roofing is durable and works well with ceiling insulation
- Transparent or translucent roofing (polycarbonate) can brighten dark spaces but needs good UV protection
Insulation:
- Bulk insulation in the roof and, where possible, walls makes a huge difference to comfort
- In cooler regions, consider under‑floor insulation for raised decks
Flooring:
- Existing timber decks may need sanding, resealing, or levelling
- You can add tiles, hybrid flooring, vinyl planks, or polished concrete (on a slab) for a more indoor feel
- Ensure any new surface meets slip‑resistance guidelines, especially where it may get wet
Upgrading these elements during the enclosure works is usually cheaper and less disruptive than trying to retrofit later.
Planning Services, Power, And Ventilation
Electrical, Lighting, And Power Outlets
Once your verandah becomes a semi‑indoor room, you’ll almost certainly want better services.
Think about:
- Power points for laptops, phone chargers, heaters, and outdoor kitchens
- Lighting zones – e.g. bright task lighting over a table and softer wall lights or pendants for ambience
- Ceiling fans to keep air moving in summer
- Data or Wi‑Fi access points if you’ll work or stream there
In Australia, all permanent wiring must be installed by a licensed electrician. Factor in access to the existing switchboard and whether it can handle additional circuits.
Natural Ventilation, Heating, And Cooling
A common mistake when people learn how to enclose a verandah in Australia is forgetting about ventilation. Without good airflow, you can end up with a hot box in summer and condensation in winter.
Design for:
- Cross‑ventilation – openings on at least two sides to let breezes flow
- High‑level louvres or windows to release hot air
- Ceiling fans to supplement natural breezes
For heating and cooling, consider:
- Reverse‑cycle air conditioning for year‑round temperature control
- Electric panel heaters or radiant heaters for cooler climates
- External shading (awnings, blinds, pergolas) to stop heat loading on glass before it gets indoors
Good passive design – shading, insulation, and ventilation – will usually reduce how much mechanical heating and cooling you need.
Practical Layout, Furniture, And Storage
Finally, think about how you’ll actually live in the space:
- Map out furniture placement before finalising doors and power points
- Allow enough room for door swings and circulation – especially for sliding or bifold doors
- Incorporate built‑in storage, seating with lift‑up lids, or narrow shelves for shoes, toys, and outdoor gear
If your verandah connects directly to your main living area, choose finishes and colours that feel like a natural extension rather than a bolt‑on room.
Step‑By‑Step Process To Enclose Your Verandah
Measuring, Designing, And Budgeting The Project
Start with accurate measurements of:
- Overall verandah length and width
- Height from floor to existing roof or eaves
- Post locations, window/door openings, and any steps or changes in level
Use these to sketch a simple plan and elevations, even if they’re rough. Then:
- Decide on enclosure type (screened, glazed, or mixed)
- Choose your framing material and roof solution
- Prepare a budget range, including approvals, materials, labour, and a contingency (10–15%)
Get at least two or three quotes if you’re hiring trades or modular suppliers. Confirm exactly what is – and isn’t – included.
Preparing The Site And Making Structural Changes
Once your design is locked in and approvals are in place:
- Clear the verandah of furniture and plants
- Protect any existing finishes you’re keeping
- Address structural issues – replace rotten posts, add extra footings if required, and straighten sagging beams
At this stage you may need:
- New or upgraded footings for extra walls or heavier glazing
- A beam or lintel if you’re creating wide openings
- Adjustments to the existing roof junction where new framing meets the house
Getting the structure right now prevents cracks, leaks, and sticky doors later.
Installing Frames, Roof, Panels, And Doors
With the structure ready, the enclosure goes in:
- Install wall framing (timber, aluminium, or steel), checking everything is plumb and square.
- Add or upgrade the roofing and insulation if part of the scope.
- Fit windows, glazed doors, louvres, or screen panels according to manufacturer instructions.
- Install external doors with appropriate locks and seals.
Pay attention to:
- Correct use of flashings and sealants around frames
- Expansion gaps where manufacturers specify them
- Fixings suitable for your wind region and exposure
Finishing, Weatherproofing, And Final Compliance Checks
The last stage turns it from a building shell into a usable room.
- Add internal linings (plasterboard, lining boards, or external cladding) where required
- Paint or stain timber and exposed surfaces
- Install skirtings, architraves, and trims to tidy junctions
- Lay your final floor finish and fit blinds or curtains if needed
Then focus on weatherproofing and compliance:
- Hose‑test or observe the space during rain to check for leaks
- Confirm all electrical work is signed off with compliance certificates
- If council required an inspection or final sign‑off, book it and keep records
Keep a folder with plans, approvals, warranties, and product manuals – it’s handy for future maintenance and adds value when you sell.
Cost, Timelines, And When To Hire A Professional
Typical Costs And Factors That Affect Your Budget
Costs vary widely, but as a rough guide in many parts of Australia:
- Simple screened enclosures might start around the low thousands of dollars, depending on size
- Partially glazed verandahs often sit in the mid‑range, especially if using quality aluminium frames
- Fully insulated, glazed sunrooms or room‑like extensions can run well into the tens of thousands, particularly once structural, electrical, and finishing trades are included
Build in a contingency: once you open up older verandahs, hidden issues are common.
Project Timelines And Minimising Disruption
A straightforward verandah enclosure can sometimes be completed in a couple of weeks on site, while more complex projects can stretch to several months from design to final sign‑off.
Typical stages:
- 1–4 weeks: design, quoting, and council or certifier approvals
- 1–2 weeks: ordering materials and scheduling trades
- 1–3 weeks: on‑site construction and fit‑off (longer for full extensions or bad weather)
To minimise disruption:
- Plan around wet seasons or known busy periods for trades
- Pack away valuables and protect indoor floors where trades will pass through
- Set expectations with neighbours about noise and access, especially for shared driveways or tight sites
Conclusion
Done thoughtfully, an enclosed verandah stops being a neglected in‑between space and becomes one of the most used rooms in your home – a light‑filled, flexible area that earns its keep in every season.